Chief
-
Posts
1,257 -
Joined
-
Last visited
-
Days Won
50
Content Type
Profiles
Forums
Gallery
Calendar
Everything posted by Chief
-
Worked all day yesterday replacing five fence posts. Mud caked on shoes so bad. Definitely not ready.
-
I believe so. There are quite a few unsanctioned lines showing up.
-
How's that leg feeling?
-
Strava times are not accurate on PP. Strava times are about two minutes faster than actual time.
-
I've been running 28 hole XM481's on DT hubs and Hope hubs. The only time I've broken a spoke is when it gets snagged on a rock. Tension might be too low.
-
You have DT XM 481's on your bike don't you? Those are bulletproof wheels IMO. What are you looking to move to?
-
That’s an easy one! Been building quite a few wheels lately.
-
How Hard Is A Pro Cyclocross Course? | Beginner Vs Infamous Zonhoven Sandpit
Chief replied to TheX's topic in Austin Roadies
Cyclocross is brutal. The Belgians take it very seriously. -
Maybe next time. We can block the trails for others with our oldness.😊
-
Notice it wasn't a copy/paste thread.😂
-
Tried it with a friend at about 13 lasted about two weeks when I made the decision if it wasn't getting me high I wasn't interested.
-
Thanks. Makes a big difference. Tried to keep as simple as possible. Park Tools on YouTube has a great video on this. Hoping we can share information and methods on here for maintenance and maybe discuss tools also.
-
I can't say that I blame you. Never smoked cigarettes.😁
-
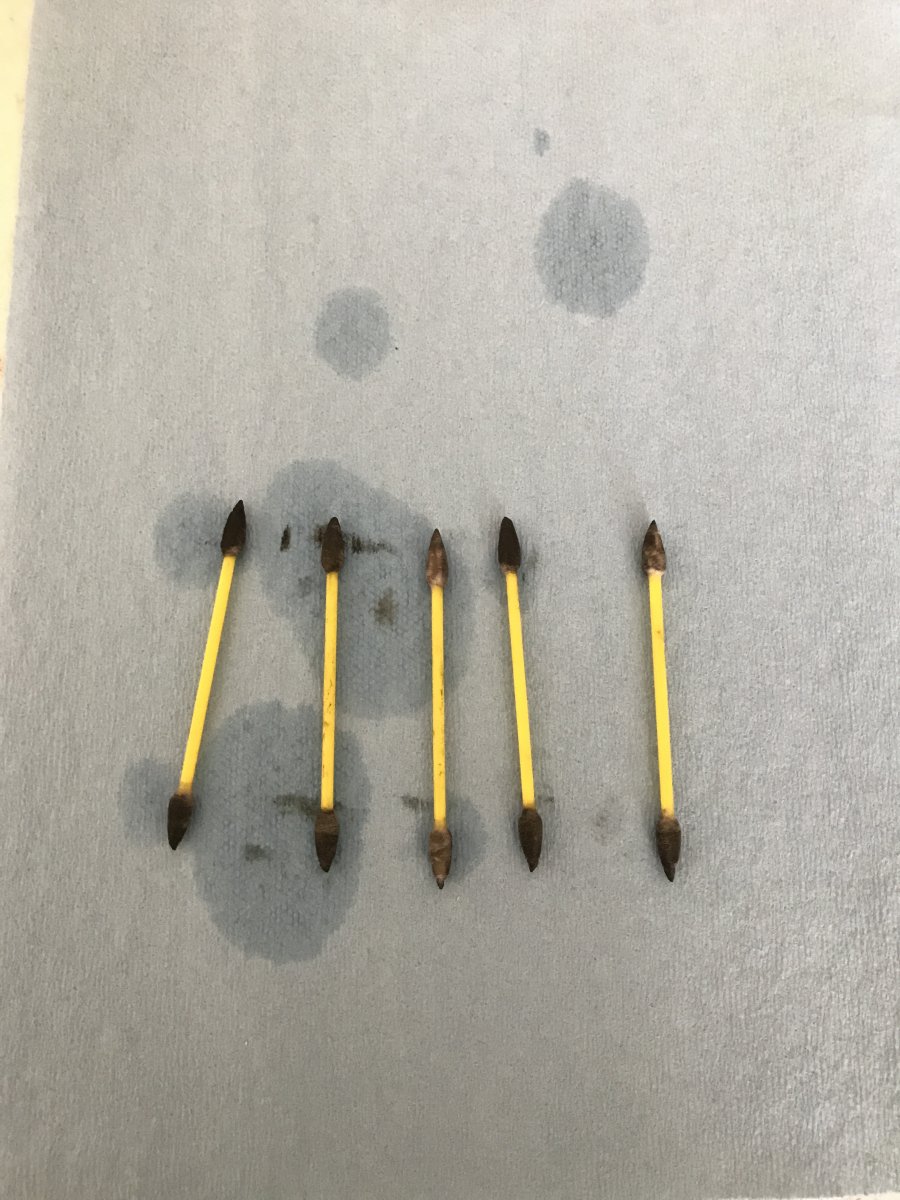
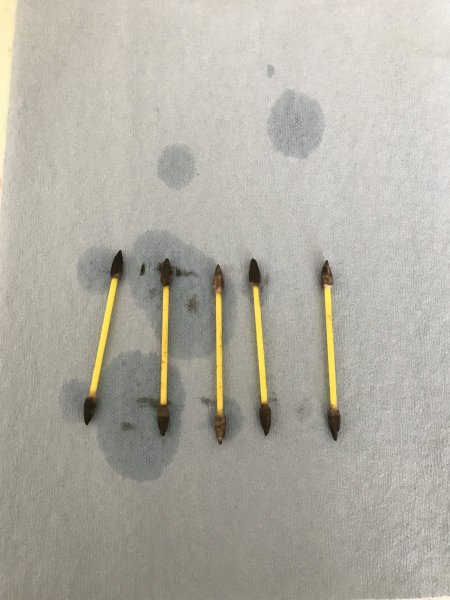
I was thinking it might be beneficial to some of us to have a technical and maintenance thread. Especially for those of us who wrench their own bikes and for those who might want to learn to do their own maintenance and repairs. So let me kick this off with a little brake maintenance that I believe gets over looked but shouldn't be. This is something you may want to consider doing if you notice you have a brake pad dragging. A dragging brake pad may be an indication of dirty brake pistons sticking when trying to retract. To start I got on one of my bikes the other day and realized the brakes weren't as good as the brakes on my other bike. I was getting no stopping power when I would try to stop. The bike has been sitting unused for a bit so I figured the brakes may have gotten contaminated just sitting in my garage. I do a lot of house type stuff and vehicle maintenance in the garage. Step one was to remove the wheels and then remove the rotors. Once I had the rotors off I took some 180P grit sandpaper on a sanding block and sanded both sides of the rotors making sure I sanded of all of the old wear indication off both sides of the rotors. Once the rotors were sanded I used denatured alcohol (isopropyl works as well) in a spray bottle to remove any sanding dust making sure the rotors were clean. Don't touch your clean rotors with bare hands it'll transfer oil onto the surface you just cleaned causing the initial issue. I then remounted the rotors torquing them to spec for the rotor bolts. From there I moved on to cleaning the brake pistons (this is the part I believe gets overlooked). When cleaning the brake pistons you'll need to remove the brake pads and using the lever expand the pistons as far as possible out of their bore without causing them to come completely out. Sounds scary but not really, it's kinda hard to get them to come completely out. Once I have the pistons out far enough I take mineral oil which is what my brakes use as fluid on a q-tip and start to clean the pistons. Taking the q-tip and going around the outside of the piston where it slides into the caliper you want to get as much black brake dust and dirt off as you possibly can this also lubricates the piston. You can do this a couple of times cleaning with alcohol in between each time. Once the pistons are clean you'll need to use a flat object that fits between the pistons on the inside of the caliper and push the pistons back into the caliper. You don't want to pry when doing this, you want to push the pistons back in straight and square, prying can damage your caliper or pistons. When done make sure to clean the caliper thoroughly with alcohol wipe with a clean shop rag and then blow them out (canned air works fine for this). You can now install NEW BRAKE PADS, you don't want to use the old pads due potential contamination which is how we got here to begin with. Once the new pads are installed reinstall the wheel and move on to the next wheel. Once you've finished it's time to bed the new pads in. Bedding in is the process of depositing brake pad material onto the rotor without over heating it causing what's known as glazing. When bedding brakes in you want to get up to a good speed not screaming fast but relatively fast and apply even pressure on the brakes slowing the bike down but not coming to a complete stop. You'll need to do this at least half a dozen times, as you're doing this you'll notice the brakes working better each time until there is no noticeable difference. Once satisfied with how your brakes are working you're done and can now move onto the next step. Going out and riding your bike while feeling like you did something positive and rewarding. PS; if you notice that you still don't have good bite or soft lever with your brakes you'll need to do a brake bleed. Maybe next installment of this thread. Also if your brakes are working fine but you notice a pad dragging you can just go right to the piston cleaning procedure. Below is a picture of what the q-tips look like after cleaning my brake pistons. Hope this helps some people.
-
Do hops and barley count as a plant based diet? If so then I'm good!👍
-
I'll take that as a no.
-
Heading out in a couple if there's anyone interested in getting a ride in with an old guy.
-
I think the problem with the signs are that they don't look official like a sign from the city, so people think that because it's not an official sign they don't need to abide by it. Not that they would if it were official either but it might cause some people to think twice before being dickheads.
-
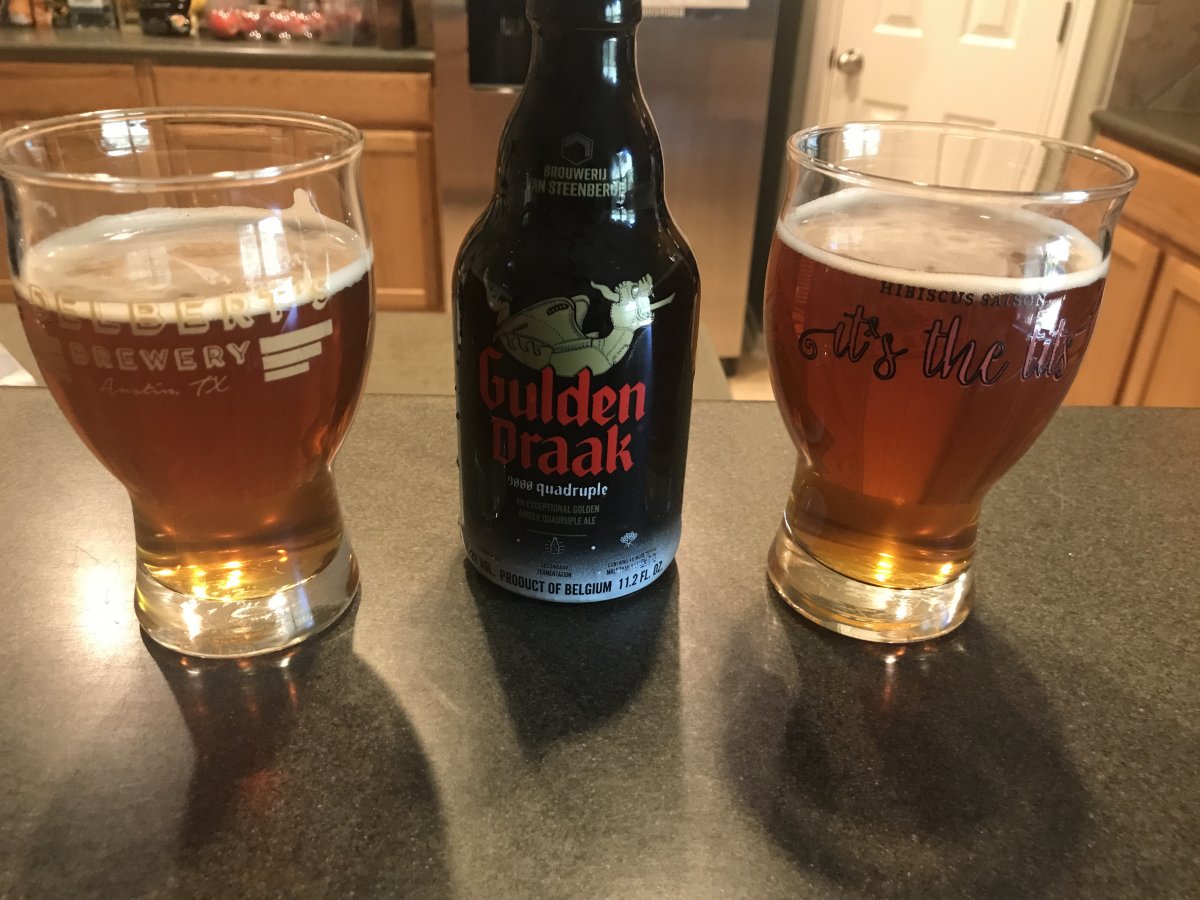
What ya drinkin? Share your thoughts on Beer, Wine, and Spirits!
Chief replied to throet's topic in General Chat
Ok so here we go. This is what I'm drinking right now. But be forewarned I may take control of this thread. BTW my wife's glass is on the right.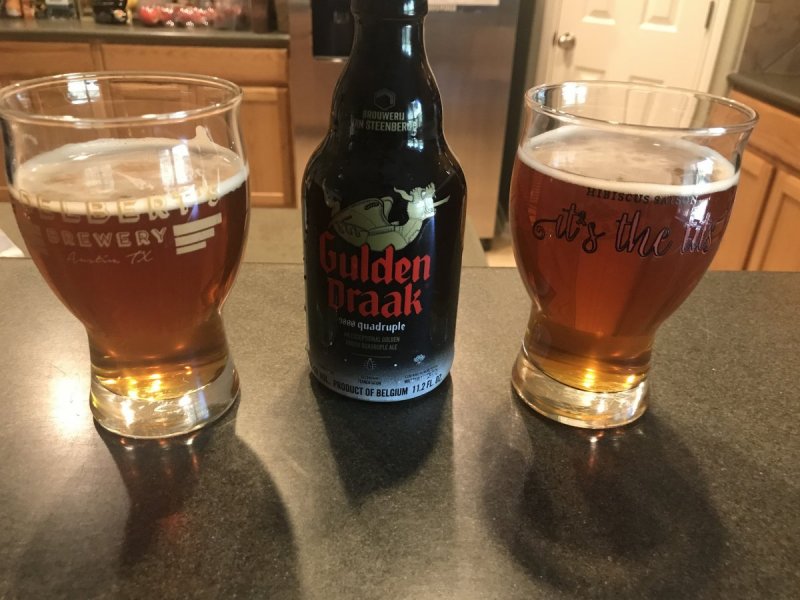
-
Also this was not done by any runners. There would be no need for runners to change this feature.
-
Oh F**K! 1/4 notch and DD seem to be getting somewhat neglected. I've noticed quite a few bypasses lately. We should try to get a crew together and correct some of these unsanctioned lines.
-
What ya drinkin? Share your thoughts on Beer, Wine, and Spirits!
Chief replied to throet's topic in General Chat
Sorry dude no pumpkin this year. Been a bit lazy with the brewing. Need to do something soon though. -
With the way some tires fit the rim, installing a tube would be almost impossible to do without pinching it. I need tire levers to install tires on my Nextie wheels.
-
What ya drinkin? Share your thoughts on Beer, Wine, and Spirits!
Chief replied to throet's topic in General Chat
Had one of red horn's house brews called Superfly Jimmy Snika' Stout. Pretty good tasted like a snickers bar.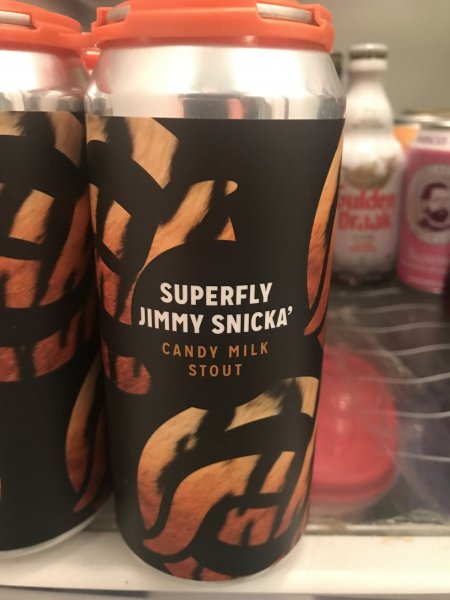
-
Tubeless has a better ride quality much more supple IMO. Saying this from a personal point just having switched my gravel bike to tubeless. With tubes the ride was harsher at the same air pressure as tubeless, I can actually run slightly higher pressure and still get a supple feeling ride.